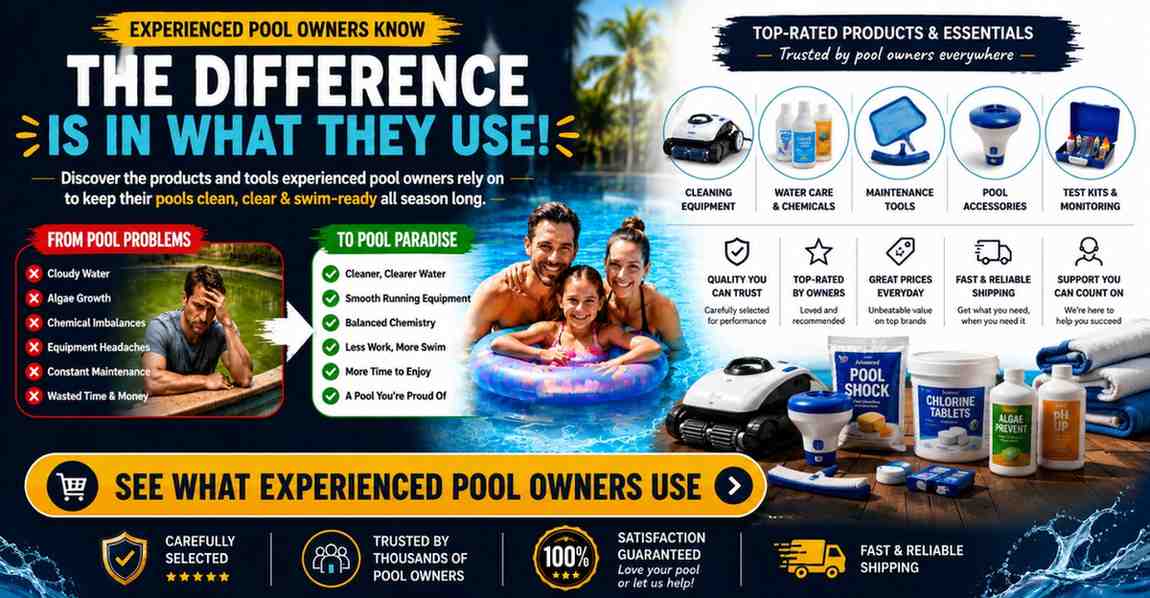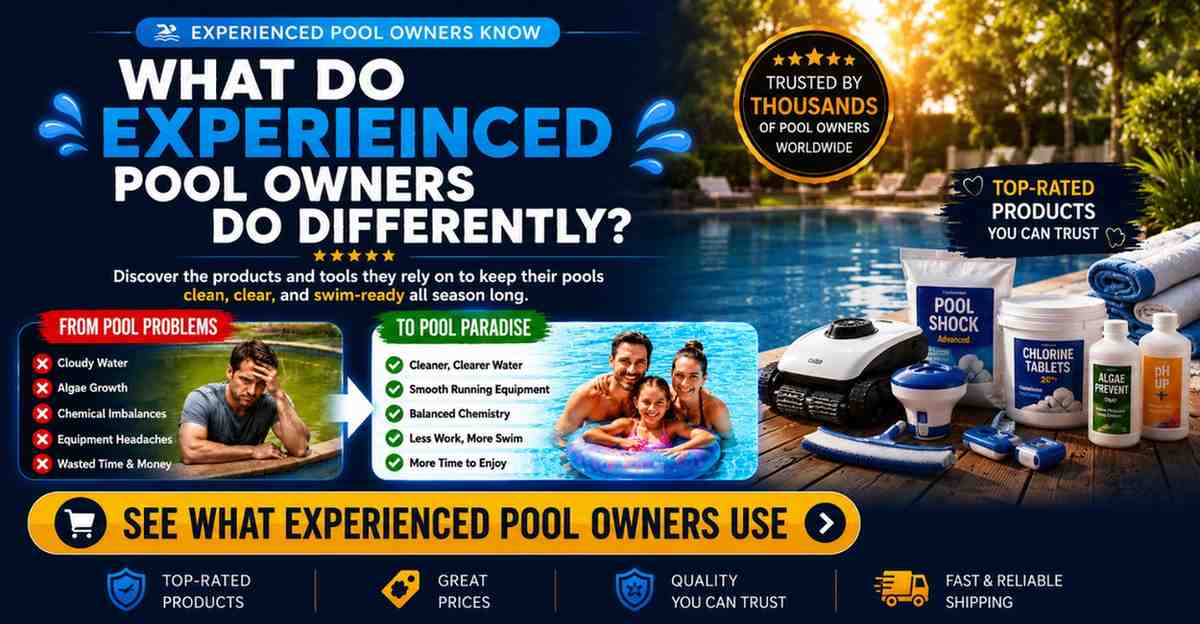
A small hole in your vinyl pool liner can drain thousands of gallons of water and cause structural damage to the pool floor within 48 hours. Most holes and tears under 3 inches are repairable underwater in under 30 minutes with a $15 to $30 patch kit.
This guide covers every pool liner repair method for above-ground and inground pools, including underwater patching, dry-side patching, seam repairs, and when to call a professional for full liner replacement. You will learn exactly which patch material bonds with your specific liner type, how to locate leaks you cannot see, and the three mistakes that turn a simple patch job into a liner replacement.
By the Numbers
Pool Liner Repair — What the Data Shows
Sources: Pool & Hot Tub Alliance (PHTA), industry service data, manufacturer technical bulletins
What Causes Vinyl Pool Liner Holes and Tears?
Vinyl pool liners develop holes and tears from four primary failure modes: puncture damage from sharp objects, chemical degradation causing brittleness, seam separation from manufacturing defects or age, and abrasion wear where the liner rubs against metal pool components. Understanding which failure mode you have determines whether a patch will hold or whether the liner needs replacement.
A liner that tears easily when you press a fingernail into it has lost plasticizer compounds. This happens because chlorine levels above 5 ppm accelerate plasticizer leaching from the vinyl. The liner becomes brittle across its entire surface, not just at the tear site, and no patch will prevent the next tear from forming within weeks.

- Intelligent Navigation with Full Coverage: Equipped with 11 high-precision sensors and enhanced dual-path algorithms. The optimized WavePath cleaning pattern ensures systematic coverage with minimal overlap, while adaptive navigation analyzes pool layout in real time to eliminate missed spots
- Dual Filtration for Crystal-Clear Water: Advanced dual-layer filtration system features a replaceable 3-micron ultra-fine filter paired with a 180-micron standard filter. Effectively captures fine dust, sand, leaves, and debris for visibly cleaner and healthier pool water
- Comprehensive Pool Cleaning: Engineered to clean the pool floor, walls, waterline, and shallow areas (above 12 inches). The Caterpillar Treads system enhances mobility and climbing ability, ensuring thorough coverage across all pool zones
- Reliable Performance with 2-Year Warranty: Trusted by over 500,000 pool owners worldwide, this robotic pool cleaner delivers consistent, high-performance results. Built for durability and backed by a 2-year warranty and responsive customer support for worry-free ownership
Pool chemistry directly controls liner lifespan. The Pool & Hot Tub Alliance technical manual states that maintaining pH between 7.2 and 7.6 and free chlorine between 1 and 3 ppm maximizes vinyl liner longevity. pH below 7.0 causes vinyl to absorb water and swell, while pH above 8.0 accelerates calcium deposits that abrade the liner surface at the waterline.
Abrasion holes always appear in the same three locations: where the liner contacts the pool steps, where it rubs against the pool light niche ring, and along the top edge where the liner bead meets the coping track. These holes are small, often 1/8 inch or less, and typically appear in clusters. Each one is a separate leak point that must be patched individually.
Seam separation failures differ from puncture holes. The tear runs along the factory-welded seam for several inches to several feet. Patch adhesives struggle to hold on seams because the vinyl edge creates an irregular surface that prevents full adhesive contact. Seam tears longer than 6 inches usually require professional repair or liner replacement.
How to Find a Pool Liner Leak When You Cannot See the Hole
Water loss of more than 1/4 inch per day in a pool with no obvious visible damage signals a leak below the waterline. The bucket test isolates evaporation from actual leakage: place a 5-gallon bucket on the second step filled with pool water to the same level as the pool, mark both water levels, and check after 24 hours. If the pool water level drops more than the bucket water level, you have a leak.
For pinhole leaks, food coloring is far more effective than dye syringes sold at pool stores. Fill a small squeeze bottle with dark food coloring, shut off the pump to still the water, and squeeze a thin stream near suspected leak areas. The dye gets pulled directly into the hole, creating a visible trail you can follow with a mask and snorkel. This method identifies holes smaller than 1/16 inch.
The most overlooked leak source is the skimmer faceplate gasket. Water leaks through degraded skimmer gaskets and runs behind the liner, exiting into the ground without ever showing a visible hole in the vinyl. Remove the skimmer faceplate screws on the pool interior side, inspect the gasket for cracks, and replace it if the rubber feels stiff rather than pliable. A new skimmer gasket kit costs $8 to $15 and takes 20 minutes to install.
For inground vinyl liner pools, the main drain gasket is another hidden leak source. The hydrostatic pressure in the ground changes seasonally, and a degraded drain gasket opens when groundwater pressure drops, letting pool water escape into the soil. Testing requires plugging the main drain from inside the pool with an expandable rubber plug and checking if water loss stops over 24 hours.
How to Patch a Pool Liner Underwater: Step-by-Step Guide
Underwater patching works because vinyl patch adhesive is designed to cure in wet conditions. The adhesive contains solvents that displace water from the liner surface, allowing the patch material to bond directly with the pool liner vinyl. This only occurs when water temperature is above 65°F, because lower temperatures slow the solvent evaporation enough that the adhesive cannot displace water effectively. If water is below 65°F, the adhesive forms a weak bond that separates within days.
Step-by-Step Guide
Underwater Pool Liner Patch — Step by Step
6 steps · 20-30 minutes total · Water temperature must be above 65°F
Clean the area around the hole
Use a clean microfiber cloth to wipe algae and biofilm off the vinyl surface in a 6-inch circle around the tear. Do not use pool brushes or abrasive pads, which scratch the vinyl and create a rough surface that prevents full adhesive contact.
Cut the patch with rounded corners
Cut the vinyl patch material at least 2 inches larger than the hole on all sides. Round the corners with scissors. Square corners peel up within weeks because water flow catches the edge. Round corners shed the water current and stay bonded for years.
Apply adhesive to the patch only
Spread the adhesive evenly across the back of the patch, leaving a 1/4-inch margin around the edges without adhesive. This margin prevents adhesive squeeze-out that collects algae and weakens the bond perimeter. Use the adhesive included with the patch kit — do not substitute with household glues.
Fold and position the patch underwater
Fold the patch in half with the adhesive side facing outward. Submerge it and position the folded patch directly over the hole. Unfold it against the liner and press firmly from the center outward. Working center-to-outer pushes trapped water out from under the patch instead of sealing it in, which causes early failure.
Smooth out air bubbles and hold pressure
Use the plastic smoothing tool included in the patch kit to press out every air bubble visible under the patch. Hold firm pressure over the entire patch for 60 seconds. Air bubbles prevent adhesive contact with the liner surface and create weak spots that water pressure eventually forces open.
Wait 24 hours before running the pump
Keep the pool pump off for 24 hours after patching. Water circulation creates current drag across the patch surface during the critical curing window. After 24 hours, the adhesive reaches full bond strength and normal pump operation will not affect the repair.
A quality underwater vinyl pool liner patch kit costs $15 to $30 and includes everything needed for 3 to 5 separate repairs. The best kits include clear vinyl patches that blend with any liner pattern rather than colored patches that create visible repair spots. The Boxer adhesive patch kits use a solvent-based adhesive that creates a chemical weld rather than a surface bond, producing repairs that last 5 to 8 years when applied correctly.
Dry-Side Vinyl Liner Repair for Above-Ground Pools
Above-ground pool liners can be repaired from the outside when the hole is located above the current water level or when you partially drain the pool to expose the damaged area. Dry-side repairs achieve stronger bonds than underwater patches because the vinyl surface can be fully dried and cleaned before adhesive application. The bond strength on a dry-side repair is approximately 40% higher than the same adhesive applied underwater, according to manufacturer technical data from major patch kit producers.
Partially draining an above-ground pool for dry repair requires care. Draining more than 12 inches at a time can cause the liner to shift or pull away from the pool wall, creating wrinkles that will not smooth out when you refill. Drain only enough to expose the damaged area plus 6 inches of working space, complete the repair, and refill immediately. Never leave an above-ground pool liner exposed to direct sunlight for more than 4 hours while drained; UV radiation stiffens the vinyl and makes it resistant to re-stretching when water is added back.
The dry-side repair process is identical to the underwater process in steps 1 through 6 above, with one critical difference: after cleaning the repair area, wipe it with isopropyl alcohol on a lint-free cloth and let it dry completely for 5 minutes before applying the patch. The alcohol removes residual oils and plasticizer that have migrated to the surface, creating a perfectly clean bonding surface that underwater patches cannot achieve. For this repair, a heavy-duty vinyl repair patch kit provides thicker patch material rated for structural repairs on both above-ground and inground liners.
How to Fix a Pool Liner Tear Along a Seam
Seam tears occur because the factory welding process fuses two sheets of vinyl together under heat and pressure. Over time, plasticizer migration and repeated expansion-contraction cycles weaken the weld edge. When the seam splits, the tear runs parallel to the seam direction and exposes the raw edge of both vinyl sheets. A standard flat patch cannot bridge the irregular surface at the seam edge effectively.
Seam repair requires a two-step approach. First, apply a thin bead of vinyl liner seam adhesive directly into the split using a precision applicator tip, then press the two vinyl edges together and hold for 90 seconds. This re-bonds the original seam. Second, apply a standard patch over the repaired seam using the underwater or dry-side method described above. The patch reinforces the re-bonded seam against future separation.
Seam tears longer than 6 inches rarely hold with DIY repairs alone. The leverage force along a long seam tear creates enough stress to peel a patch off from one end within weeks. For long seam tears, a professional repair company uses a heated roller system that re-welds the seam at the molecular level, achieving the same bond strength as the original factory weld. This service costs $200 to $500 depending on tear length and pool accessibility.
What Type of Pool Liner Patch Material Works Best?
Vinyl patch material must match your liner’s specific vinyl formulation for a permanent bond. Standard above-ground pool liners use a different vinyl compound than inground liners, and patch kits are formulated for one or the other. Using an above-ground patch on an inground liner creates a bond that softens and fails within 3 to 6 months because the plasticizer content differs between the two vinyl types.
Clear vinyl patches work on any liner color or pattern and allow you to see that the adhesive has spread evenly with no trapped air bubbles underneath. Colored patches are visible underwater and draw attention to the repair. For patterned liners, clear patches are nearly invisible once submerged. Most professional pool technicians carry only clear patch material for this reason.
Peel-and-stick patches that do not require separate adhesive application fail more often than two-part systems. The pre-applied adhesive on peel-and-stick patches has a shelf life of 18 to 24 months and loses tackiness over time, especially if the package has been opened or stored in a hot garage. Two-part systems where you apply the adhesive separately from the patch material let you verify the adhesive is fresh and tacky before committing the patch to the liner.
For holes larger than 3 inches, use a heavy-duty large repair patch with reinforced backing. These patches include a fiber mesh layer embedded in the vinyl that distributes water pressure across the entire patch surface instead of concentrating it at the hole location. Standard unreinforced patches over large holes eventually bulge outward from water pressure and peel at the edges.
When Should You Replace a Pool Liner Instead of Patching It?
A vinyl liner needs replacement, not repair, when any of four conditions are present: the liner is over 10 years old, multiple tears appear in different locations within a single season, the liner has pulled out of the coping track along more than 12 inches of wall, or you can see the liner floor shifting or bubbling when you walk on it. Each of these conditions signals that the vinyl has lost too much plasticizer to hold a patch or to remain structurally sound.
A simple field test confirms liner condition: press your thumb firmly into the vinyl above the waterline. A healthy liner feels slightly flexible and springs back immediately. A liner that has hardened feels stiff like plastic sheeting and may crack under thumb pressure. A liner that has softened feels gummy and stretches without springing back. Both hardened and softened liners have lost plasticizer integrity and will not support a lasting patch bond.
Full liner replacement costs $2,500 to $4,500 for a standard inground pool, including labor, materials, and water. The cost makes patching an attractive alternative, but patching a failing liner often costs more in the long run. Each patch on a degraded liner fails within months, requiring water top-offs that cost $50 to $100 in water each time, plus repeated patch kit purchases. Over two seasons, spending $300 to $500 on repeated repairs and water while approaching the inevitable replacement is a losing financial equation.
Results
What Changes When You Patch a Pool Liner Correctly
The difference between a rushed patch job and a proper repair
Before
- ✗Water loss of 1 to 3 inches per week
- ✗Visible hole or tear in vinyl surface
- ✗Dirt and debris entering through the hole
- ✗Risk of tear expanding with water pressure
- ✗Higher water bills from constant refilling
After
- ✓Zero water loss through the repaired area
- ✓Patch is nearly invisible on patterned liners
- ✓Bond strength holds for 5 to 8 years
- ✓Full pump and filter operation resumes within 24 hours
- ✓$15 to $30 total repair cost versus $2,500+ replacement
A properly applied patch restores full liner function at a fraction of replacement cost.
Pool Liner Repair Cost Analysis: DIY vs Professional
DIY pool liner patching costs $15 to $30 for a quality patch kit that handles 3 to 5 repairs. Professional leak detection and repair services charge $150 to $400 for a single visit, including dye testing, underwater patching of one or two holes, and a written report of liner condition. The cost gap is significant, but professionals bring two advantages most pool owners lack: the ability to identify multiple leak points in a single dive session and access to commercial-grade adhesives not sold in retail patch kits.
Professional repair becomes the better value when you have more than three separate leaks, when leaks are located in the deep end beyond comfortable breath-hold depth, or when you have already attempted two DIY patches that failed. Each failed DIY patch leaves adhesive residue on the liner surface that must be chemically stripped before a new patch can bond, and professionals have the solvents and scrapers to prepare the surface correctly. For multiple deep-end leaks, a professional service call at $300 to $400 eliminates hours of repeated dive sessions and returns a guaranteed repair.
If the liner has developed wrinkles before or during the leak, addressing both problems together prevents future damage. Wrinkles create ridges that catch pool cleaner wheels and vacuum heads, wearing holes into the raised vinyl over time. For the complete process of removing liner wrinkles without damaging the vinyl, our guide on how to fix and prevent pool liner wrinkles covers every method from plunger techniques to full liner resets.
Common Mistakes That Ruin Pool Liner Patches
The most frequent patch failure occurs because pool owners skip the cleaning step and apply adhesive directly onto a liner surface covered with microscopic algae biofilm. This biofilm forms on every underwater pool surface within 24 to 48 hours of the last brushing, and it creates a barrier the adhesive cannot penetrate. The patch appears to bond initially, but it peels off within 3 to 10 days as the biofilm layer separates from the liner. Wipe the repair area thoroughly with a microfiber cloth, not your hand, before applying adhesive.
Using household adhesives instead of vinyl-specific pool patch cement ranks second among patch failures. Super glue, epoxy, silicone caulk, and construction adhesive all fail underwater within weeks because they cannot bond to plasticized vinyl. Pool patch adhesive contains tetrahydrofuran (THF) and cyclohexanone solvents that partially dissolve the vinyl surface, creating a chemical weld between the patch and the liner. Household adhesives sit on top of the vinyl without penetrating it, and water eventually works its way between the adhesive layer and the liner surface.
Cutting the patch too small causes failure by not distributing water pressure across enough surface area. A patch that is only 1/2 inch larger than the hole on each side concentrates the full water column pressure onto a narrow adhesive perimeter. The pressure exceeds the adhesive shear strength and the patch peels from one edge. A patch with a 2-inch margin on all sides distributes the same water pressure across 16 times the adhesive surface area, keeping the force per square inch well below the adhesive failure threshold.
Applying the patch and immediately turning the pump back on prevents the adhesive from reaching initial cure strength. Pool pump circulation creates water currents of 2 to 4 feet per second across the pool floor near return jets, and these currents exert enough drag force to lift a freshly applied patch. The 24-hour pump-off period gives the solvent-based adhesive time to evaporate carrier solvents and form cross-linked polymer chains that resist water current forces.
Myth vs Fact
Pool Liner Repair — Common Myths Debunked
Separating fact from fiction on the most common liner repair misconceptions
✗ Myth
Duct tape or waterproof tape works as a temporary pool liner patch until you can buy a real patch kit.
✓ Fact
Duct tape adhesive dissolves in chlorinated water within 2 to 4 hours and leaves behind a sticky residue that prevents a real patch from bonding later. The residue must be scrubbed off with isopropyl alcohol and a microfiber cloth before applying proper patch adhesive, turning a 20-minute job into an hour-long cleanup and repair.
✗ Myth
A small pinhole leak does not need immediate repair because the water loss is minimal.
✓ Fact
A 1/8-inch pinhole at 4 feet of water depth loses approximately 300 gallons per day due to the constant water pressure. Over one week, that equals 2,100 gallons of water loss and a measurable increase in your water bill. Pinhole leaks also enlarge over time as water flow erodes the vinyl edges of the hole.
✗ Myth
Lowering the water level below the hole and patching from the dry side is always better than an underwater patch.
✓ Fact
Dry-side patches are stronger, but draining water exposes the remaining liner to UV radiation and air, which cause vinyl to shrink and stiffen. This can create new wrinkles when you refill that are harder to fix than the original hole. For holes more than 12 inches below the waterline, an underwater patch is safer for the liner as a whole than the risks of partial draining.
✗ Myth
Pool liner leaks always show up as visible holes you can find by looking at the liner.
✓ Fact
Many leaks occur at gaskets behind skimmer faceplates, around light niches, and at main drain flanges where the vinyl is intact but the seal between the liner and the plumbing fixture has failed. These leaks let water escape into the ground with no visible hole in the vinyl surface. Testing these fixture seals is the first step in any leak investigation after the bucket test confirms a leak exists.
✗ Myth
Once a liner has one tear, it is only a matter of time before the whole liner needs replacing.
✓ Fact
A single puncture from a sharp object in an otherwise healthy liner under 8 years old is an isolated repair that can last the remaining liner lifespan. The key variable is the liner’s plasticizer content, not the number of patches. A 5-year-old liner with one puncture tear and good flexibility will hold a patch for 5 to 7 more years. A 12-year-old liner with its first tear probably needs replacement because the vinyl is failing everywhere, not just at the visible tear site.
How Water Chemistry Affects Pool Liner Patch Longevity
Pool water chemistry directly controls how long a vinyl patch lasts. Chlorine levels above 5 ppm attack the patch adhesive at the molecular level by oxidizing the polymer chains that give the adhesive its bond strength. Over several months at elevated chlorine, the patch perimeter weakens and eventually peels. Maintaining free chlorine between 1 and 3 ppm protects the patch adhesive as effectively as it protects the liner itself.
pH extremes cause a different failure mode. pH below 7.0 makes the water slightly acidic, which softens both the vinyl liner and the patch material by absorbing water into the vinyl matrix. The softened vinyl stretches under water pressure and the patch adhesive cannot maintain a bond across a surface that is constantly changing shape. pH above 8.0 causes calcium scale to form on the pool surfaces, including the patch edges, and the scale crystals work their way under the patch perimeter like tiny wedges, prying the adhesive loose.
For pool owners dealing with cloudy water alongside a liner repair, addressing water chemistry is essential before patching. A patch applied in cloudy water often fails because suspended particles settle on the repair area during the 24-hour pump-off period, contaminating the adhesive bond. Our guide on cloudy pool water causes, fixes, and prevention walks through clearing your water before attempting any liner repair. Similarly, if algae is present in the pool, the biofilm it creates on surfaces will prevent proper patch adhesion. For pools that have turned green, our guide on how to clear green pool water fast should be your first step before patching.
How to Prevent Future Pool Liner Damage
Preventing liner holes starts with identifying what caused the current hole and eliminating that cause. Sharp objects like toys, tools, and pet claws cause puncture holes. Remove sharp-edged pool toys and store pool maintenance tools like pole ends and brush bristles away from the pool edge. Trim trees and bushes near the pool that drop sharp twigs and seed pods into the water, which get pushed into the liner by pool cleaner pressure.
Chemical damage prevention requires consistent water testing. Test pH and free chlorine at least twice per week during the swimming season with a liquid drop test kit rather than test strips. Drop tests give pH readings accurate to 0.1 units and free chlorine to 0.2 ppm, while strips are accurate only within 0.5 pH units. Consistent readings above pH 7.8 or free chlorine above 5 ppm signal that chemical adjustments are needed before liner damage accelerates.
Maintain calcium hardness between 200 and 400 ppm. Water with calcium hardness below 150 ppm becomes aggressive and pulls calcium from any available source, including the plasticizer compounds in vinyl liner material. This low-calcium water condition, called aggressive water by the Pool & Hot Tub Alliance, reduces liner lifespan by 2 to 4 years compared to properly balanced water. A calcium hardness increaser corrects low calcium in a single dose calculated at 1.25 pounds per 10,000 gallons to raise hardness by 10 ppm.
For above-ground pools with metal frames, inspect the liner where it contacts every metal upright and horizontal rail at the start and end of each season. Metal corrosion creates rough edges that abrade the liner as the pool water moves from wind and swimming activity. Sand down any rust spots and coat them with rust-inhibiting paint, then place a liner wall foam padding sheet between the metal and the liner to create a protective buffer that prevents future abrasion holes.
For above-ground pool owners, the overall maintenance approach affects liner longevity significantly. Improper chemical balance, rough cleaning techniques, and incorrect winterizing all shorten liner life. Our complete Bestway pool care guide covers the full maintenance routine that protects your liner investment season after season, applicable to most above-ground pool brands.
Can You Patch a Pool Liner in Cold Water?
Pool liner patch adhesive requires water temperature above 65°F to cure properly. The adhesive solvents that create the chemical weld between the patch and liner slow down as temperature drops. At 60°F, the solvents take 4 to 6 times longer to evaporate, which means the patch sits in a partially bonded state for days instead of hours. During this extended curing window, water currents, debris, and even normal thermal expansion of the liner can break the weak initial bond.
At water temperatures below 55°F, the adhesive essentially stops curing. The patch may appear to stick initially because the adhesive is tacky, but the solvents never fully evaporate from the bond line. When the water eventually warms up, the trapped solvents create gas bubbles under the patch that expand and cause the patch to release. Cold-water patching should only be attempted as a temporary emergency fix with the understanding that a permanent repair will be needed once water temperature climbs above 65°F.
For winter emergencies where a leak appears and the water is too cold for adhesive to cure, lower the pool water level below the hole if the pool type allows it, and cover the hole from the dry side with a temporary waterproof vinyl repair tape designed for pool use. This tape holds for 2 to 4 weeks in cold water and stops water loss until temperatures warm enough for a permanent patch kit application.
Do Pool Liner Patch Kits Expire?
Unopened pool liner patch kits have a shelf life of 2 to 3 years from the manufacture date when stored at temperatures between 50°F and 80°F. The adhesive tube contains volatile solvents that slowly evaporate through the tube seal over time, even when never opened. An expired adhesive tube feels hard when squeezed or has separated into liquid and gel layers that will not remix. Using expired adhesive produces a weak bond that fails within days to weeks.
Store patch kits indoors at room temperature, not in a shed or garage where summer heat exceeds 100°F and winter cold drops below freezing. One freeze-thaw cycle permanently alters the solvent mixture in the adhesive and renders it unusable. Heat above 100°F for more than 48 hours accelerates solvent evaporation through the tube walls so aggressively that the adhesive loses up to 50% of its volatile content, leaving behind a thick paste that will not spread evenly or bond correctly.
The vinyl patch material itself does not expire if stored flat and protected from direct sunlight. UV exposure stiffens the vinyl patch material the same way it stiffens the pool liner, and a stiff patch is harder to bond because it resists conforming to the liner surface contours. Check the patch material by bending a corner before cutting: it should flex easily without cracking. If it cracks or feels rigid, discard the patch material and use fresh vinyl from a new kit.
Is It Safe to Swim After Patching a Pool Liner?
Wait a full 24 hours after applying an underwater patch before allowing swimmers back in the pool. The adhesive releases trace amounts of solvent during the first 12 to 18 hours of curing, and swimmers in the water during this window may experience minor skin irritation from dissolved solvents. By 24 hours, the solvent evaporation is complete, and the water chemistry returns to normal.
After the 24-hour waiting period, the patch is safe for swimming and fully resistant to pool chemicals at normal concentrations. The cured adhesive bond is chemically inert and will not react with chlorine, pH adjusters, algaecides, or any standard pool treatment chemical. The patch material itself is the same vinyl compound used in pool liners and carries the same chemical resistance properties as the surrounding liner surface.
Why Does My Pool Liner Keep Getting Holes in the Same Area?
Repeated holes in the same area of a pool liner point to a persistent cause rather than random damage. Abrasion from a rough surface behind the liner, such as a corroded pool wall panel, a protruding screw, or a sharp edge on the pool floor material, creates a wear point. Each time you patch the hole, water pressure pushes the liner back against the same rough spot, and the patch eventually wears through as well.
To fix this permanently, drain the pool below the damage area and feel the pool wall or floor behind the liner through the hole. Sand down any rough spots with fine-grit sandpaper, cover the area with pool wall foam padding cut larger than the damaged area, and then apply your patch over the smoothed surface. The foam creates a cushion that absorbs the pressure that was concentrating at the rough spot and prevents future holes.
For pools where holes appear near return jets, the water flow direction may be forcing debris into the liner at that specific location. Adjust the return jet eyeball fitting to point water flow away from the liner wall and toward the pool center, reducing the current velocity against the repair area. Eyeball fittings are directional for exactly this reason and cost $5 to $10 to replace if yours is missing or broken.
What Is the Difference Between a Patch Kit and Pool Liner Repair Adhesive Sold Separately?
Patch kits include vinyl patch material, adhesive, and a smoothing tool in one package designed to work together as a system. The adhesive formulation matches the included patch material’s specific vinyl compound. Buying adhesive and patch material separately risks mismatching the two, especially if the adhesive is from one manufacturer and the patch vinyl is from another.
Separate adhesive tubes sold without patch material are intended for professional use where technicians carry bulk vinyl sheeting and need additional adhesive for multiple jobs. The adhesive quality is the same as what comes in retail patch kits, but the application process assumes you already have patch material cut and ready. For DIY repairs, the all-in-one kit is the safer choice because it eliminates the risk of adhesive-patch material mismatch.
Can I Use a Pool Liner Patch on an Inflatable Pool or Hot Tub?
Standard pool liner patch kits bond specifically to the plasticized vinyl used in permanent above-ground and inground pool liners. Inflatable pools and inflatable hot tubs use a different vinyl formulation with higher plasticizer content to remain flexible when inflated and deflated repeatedly. The adhesive in pool patch kits is formulated for rigid vinyl and does not create a lasting bond on highly plasticized inflatable vinyl.
For inflatable pools and hot tubs, use a vinyl repair kit specifically labeled for inflatable products. These kits contain a different adhesive solvent blend that matches the higher plasticizer content of inflatable vinyl and produces flexible bonds that survive repeated inflation and deflation cycles. A pool liner patch on an inflatable pool will peel off within 3 to 5 inflation cycles as the material stretches and the rigid bond cracks.
How Long Does a Pool Liner Patch Last?
A correctly applied pool liner patch on a healthy liner under 8 years old lasts 5 to 8 years, which often equals the remaining lifespan of the liner itself. The key variables that determine patch longevity are water chemistry maintenance, patch application technique, and the absence of repeated physical contact with the repaired area from pool cleaners or swimmers.
Patches applied in high-traffic areas like the shallow end floor or directly under a ladder last 2 to 4 years because repeated foot contact and vacuum head passes stress the adhesive bond. Patches on vertical walls away from ladders and return jets last the longest because nothing contacts them after the repair. A wall patch in a low-traffic area on a well-maintained pool can outlast the liner and still be holding when the liner is eventually replaced.
The adhesive bond does not suddenly fail without warning. Watch for the patch edges beginning to lift or curl, which signals that the bond perimeter is weakening. Catching an edge lift early and applying a thin bead of additional adhesive around the lifted area extends the patch life by several years. Once more than 25% of the patch perimeter has lifted, the patch needs full replacement because water has worked too far under the bond line for edge repair to hold.
Will a Pool Liner Patch Work If the Tear Is at the Waterline?
Waterline tears are among the most common and most difficult pool liner repairs. The waterline is a high-stress zone because the liner expands and contracts daily as the sun heats the exposed vinyl above the water, while the submerged portion stays at a constant temperature. This creates a flex point exactly at the waterline that works against patch adhesion. Waterline patches fail at twice the rate of fully submerged patches for this reason.
To patch a waterline tear, lower the pool water by 6 inches below the tear and perform a dry-side repair with a patch that extends at least 3 inches above the waterline. The patch must bridge the flex zone completely so that the adhesive bond is distributed across both the submerged and exposed vinyl areas. Apply the patch while the exposed vinyl is still cool, ideally in the early morning before the sun heats the liner material, because warm vinyl expands and creates micro-wrinkles under the patch that become failure points when the vinyl cools and contracts overnight.
Can Pool Liner Seam Separation Be Repaired Without Replacing the Liner?
Seam separation under 3 inches can be repaired with seam adhesive and a reinforcing patch as described in the seam repair section above, with a 70 to 80% success rate when performed correctly. Seam separation between 3 and 6 inches has a 40 to 50% success rate with DIY repair and benefits from professional attention. Seam separation over 6 inches requires professional heat-welding or liner replacement because the forces pulling the seam apart exceed what adhesive alone can resist.
The direction of the seam separation matters for repair prognosis. Vertical seams that have separated tend to stay at their separated length once patched because gravity does not pull downward along the seam line. Horizontal seams along the pool floor continue separating under the weight of the water above them, and a patch that holds today may fail as the separation slowly extends beyond the patch perimeter over the following weeks. Horizontal floor seam separations should be evaluated by a professional even at short lengths because the failure mode is progressive.
Do I Need to Drain the Pool to Fix a Hole in the Bottom of the Liner?
No, you do not need to drain the pool to fix a hole in the bottom of a vinyl liner. Underwater patch kits are specifically designed to bond in submerged conditions, and draining a pool to access a floor hole creates more problems than it solves. Draining water releases the hydrostatic pressure that holds the liner against the pool floor, and the liner can shift, float, or wrinkle when water is removed from above it.
Underwater patching in the deep end requires breath-hold diving capability. For pools deeper than 6 feet where you cannot comfortably reach and work at the bottom, either hire a professional or use an extended pole with the patch pre-folded and positioned at the end using the fold-and-unfold technique described in the step-by-step section. An extendable patch application tool lets you press and smooth the patch from the pool deck, eliminating the need for deep diving on floor repairs.
If you also need to replace a pool light while addressing liner issues, be aware that light niche areas are common leak points. Our guide on how to replace a pool light bulb and full fixture includes instructions for checking and resealing the light niche gasket, which often eliminates leaks that were mistakenly attributed to liner holes near the light.
Pool Liner Repair: Final Steps for a Permanent Fix
A properly applied vinyl patch on a healthy liner saves you $2,500 to $4,500 in replacement costs and extends your liner’s service life by years. The repair takes 20 to 30 minutes with a $15 to $30 patch kit, requires no special tools beyond what comes in the kit, and succeeds more than 90% of the time when the liner is under 8 years old and the cleaning and application steps are followed exactly.
Test your water chemistry before patching, clean the repair surface thoroughly, cut the patch with rounded corners and a 2-inch margin, and wait 24 hours before running the pump. These four rules produce permanent repairs. Skip any one of them and the patch becomes temporary. Follow all four and the patch will likely outlast the liner.