
Most above ground pool installations fail before the first wall panel goes up. The failure happens weeks earlier when the site is chosen by eye instead of by level, and the ground settles unevenly under 45,000 pounds of water. A 24-foot round pool holds roughly 14,000 gallons of water — you can use our pool volume calculator to find the exact volume for your pool — weighing about 117,000 pounds. Half an inch of uneven settling turns into a visible lean that stresses the wall and shortens the liner life by years.
This guide walks you through the complete above ground pool installation from bare ground to filled pool. It covers site selection, ground leveling, wall assembly, liner installation, filling, and equipment hookup with specific measurements and tolerances that professional installers use.
| Photo | Best Above-Ground Pools | Price |
|---|---|---|
|
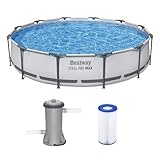
Bestway Steel Pro MAX 12' x 30" Above Ground Swimming Pool Set with Pump | Check Price On Amazon |
|
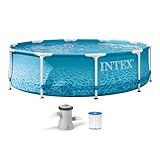
INTEX Beachside Metal Frame 10ft x 30in Round Pool Set w/Pump | Check Price On Amazon |

|
H2OGO! Kids Splash-in-Shade 8-Foot Round Steel Frame Above Ground Pool with Water Mister and Canopy Sunshade, Green Tropical Leaf Print | Check Price On Amazon |
By the Numbers
Above Ground Pool Installation — Key Specifications
Sources: Pool & Hot Tub Alliance (PHTA), manufacturer installation manuals, professional installer surveys
What Tools and Materials Do You Need for an Above Ground Pool Installation?
Professional installers show up with a specific kit. Missing one tool can stop the entire job.
You need a transit level or laser level for ground prep. A carpenter’s level is not accurate enough across a 24-foot span. A 2×4 that is 8 feet long with a 4-foot level taped to it works as a manual alternative but takes much longer.

- Intelligent Navigation with Full Coverage: Equipped with 11 high-precision sensors and enhanced dual-path algorithms. The optimized WavePath cleaning pattern ensures systematic coverage with minimal overlap, while adaptive navigation analyzes pool layout in real time to eliminate missed spots
- Dual Filtration for Crystal-Clear Water: Advanced dual-layer filtration system features a replaceable 3-micron ultra-fine filter paired with a 180-micron standard filter. Effectively captures fine dust, sand, leaves, and debris for visibly cleaner and healthier pool water
- Comprehensive Pool Cleaning: Engineered to clean the pool floor, walls, waterline, and shallow areas (above 12 inches). The Caterpillar Treads system enhances mobility and climbing ability, ensuring thorough coverage across all pool zones
- Reliable Performance with 2-Year Warranty: Trusted by over 500,000 pool owners worldwide, this robotic pool cleaner delivers consistent, high-performance results. Built for durability and backed by a 2-year warranty and responsive customer support for worry-free ownership
Essential tools: A transit level or rotary laser level gives readings accurate to within 1/8 inch at 100 feet. A tamper or plate compactor compacts the soil after leveling. A hand tamper with a 10-inch by 10-inch plate works for small areas. Rent a gas-powered plate compactor for anything larger than an 18-foot round pool footprint.
Additional tools: You need a rubber mallet, screwdrivers (both Phillips and flathead), an adjustable wrench set, a utility knife, duct tape, a measuring tape that is at least 25 feet long, a garden hose, a wheelbarrow, a shovel, a garden rake, and safety glasses and work gloves.
Materials: The pool kit includes wall panels, top rails, bottom rails, uprights, connectors, and the liner. You must supply the sand base (2-3 cubic yards for a 24-foot round pool), patio blocks measuring 2 inches thick by 8 inches by 16 inches for each upright, and a ground cloth or geotextile fabric to prevent weeds from growing through the liner.
The right tools and materials prepared in advance prevent the most common installation problem: discovering you are missing a critical item after the old pool is already dismantled before a replacement install or after the ground is already excavated.
How to Choose the Right Location for Your Above Ground Pool
The pool location determines installation difficulty, maintenance frequency, and how much you will use the pool. Direct sunlight keeps the water warmer but accelerates chlorine loss from UV exposure.
Choose a location with maximum sun exposure (6 or more hours of direct sun per day). Water temperature drops 8-12°F in full shade versus full sun. Position the pool away from trees, whose roots can grow toward the pool seeking moisture from any small liner leak or splash-out and whose leaves and pollen add organic debris that consumes chlorine.
Avoid overhead power lines completely. The National Electrical Code (NEC) requires a minimum 10-foot horizontal clearance from pool water to overhead power lines carrying up to 50kV. Utility lines transmitting more than 50kV require a minimum 22.5-foot clearance plus additional clearance per kV above 50kV.
Locate the pool within 25 feet of a dedicated GFCI-protected outdoor electrical outlet to avoid running extension cords, which is prohibited by NEC Article 680 for any permanent pool connection. The pump and filter need a level equipment pad within that distance.
Check for underground utilities before any digging begins. Call 811 in the United States to have utility lines marked free of charge at least 48 hours before you plan to break ground. Underground gas lines, water mains, and electrical conduits all pose serious safety hazards during excavation.
The location also affects your ongoing maintenance costs. A pool under trees requires 30-50% more chlorine per season and more frequent skimming and vacuuming. Choose the sunniest, most open area on your property with level ground or ground that can be leveled without major excavation.
Buying Guide
Before You Dig — Above Ground Pool Site Checklist
Check off each point before you begin ground preparation.
How to Level the Ground for an Above Ground Pool
Ground leveling is the single most important step in above ground pool installation. A pool that is out of level by more than 1 inch puts uneven stress on the wall and causes visible water level difference that swimmers will notice immediately.
Measure the high and low points of your site by driving a stake at the center of the pool area and marking the exact pool radius plus 12 inches on it. Use a rotary laser level with a grade rod to measure elevation at every upright position mark. The ground at each upright must be within 1 inch of the same elevation.
This happens because water pressure at the pool wall increases linearly with depth. A 1-inch height difference means the liner stretches 1 inch more on the low side. Over a full season, that differential stretching concentrates at the seam and eventually causes liner failure at the bead track.
This leveling process only works correctly when you cut down the high side rather than building up the low side. Filled soil on the low side will compress under 117,000 pounds of water weight, undoing the leveling work within weeks. The ground beneath every upright must be undisturbed and compacted native soil.
Remove all sod, rocks, and organic material from the pool footprint plus a 12-inch perimeter. Cut the high side down to the elevation of the lowest point using a shovel, a garden rake, and a tamper. Check the elevation at every upright position with the laser level after each pass.
If you build up the low side with fill dirt instead of cutting the high side, the result is a sinking pool wall within the first month of filling. Compacted fill dirt settles as water weight bears down. The pool leans visibly. The liner stretches unevenly. Fix it by removing all fill from the low side and cutting the high side down to match the native undisturbed ground elevation.
For full step-by-step instructions on this critical phase, see our detailed guide on leveling ground specifically for above ground pool installation.
Step-by-Step Guide
How to Level the Ground for an Above Ground Pool — Step by Step
6 steps · 4-8 hours for a 24-foot round pool site with two people
Mark the pool footprint plus 12 inches
Drive a stake at the exact center. Tie a string to the stake at the pool radius plus 12 inches. Walk a circle dragging a spray paint can or marking flag at the string end to create the perimeter.
Remove all sod, rocks, and roots from the entire marked area
Strip the vegetation completely down to bare mineral soil. Organic material decomposes under the pool and creates voids that cause uneven settling of the liner base.
Find the lowest natural point within the footprint
Set up the laser level on a tripod outside the work area. Walk the grade rod across the footprint and record elevations. The lowest undisturbed spot becomes your target elevation for the entire pool base.
Cut down the high side — never build up the low side
Shovel soil from high areas and move it outside the pool footprint. Check elevation with the laser every 2-3 shovel passes. Target a tolerance of 1/2 inch across the entire circle for a margin of safety.
Compact the leveled ground thoroughly
Use a plate compactor across the entire footprint in overlapping passes. Water the ground lightly before compacting if the soil is dry and dusty. Water helps soil particles bind together during compaction.
Set patio blocks at each upright position flush with the ground
Dig a shallow recess for each 2x8x16-inch patio block at every upright location. The block top must be exactly flush with the finished ground surface and dead level in both directions. Check with a 4-foot level on each block individually.
How to Assemble the Pool Wall and Frame
Pool wall assembly requires patience and a strict order of operations. The wall panels must be connected on the ground before they are raised into position. The bottom track or bottom rail goes down first, followed by the wall, then the uprights and top rails.
Lay out the bottom track or bottom rail in a perfect circle first. Connect all sections loosely. Measure across the circle in at least four directions. All measurements must be within 1/2 inch of the stated pool diameter. Adjust the bottom track until the circle is true before proceeding.
This works because the wall panels rely on the bottom track for alignment. If the track forms an oval instead of a circle, the wall will not meet at the final connection point or will bow outward under water pressure at the widest points.
The wall unrolls inside the bottom track channel. Work with two or three people for this step. One person feeds the wall while the others walk it around the track. The wall must sit completely in the channel without any sections riding up over the edge.
If the wall is not fully seated in the bottom track, the result is a blowout at that location when the pool fills. The 117,000 pounds of water pressure pushes outward equally in all directions. A wall section not captured in the track has no resistance at the bottom edge. Fix it by checking the wall seating in the track at every point before connecting the ends.
The wall ends connect with a joining plate and bolts. Use the hardware provided in the kit. Tighten all bolts to the torque specification in the manual, typically 15-20 foot-pounds. Overtightening can strip the bolts. Undertightening allows the wall to separate under load.
Install uprights next. Each upright sits on its patio block and attaches to the wall. The bottom of the upright must sit fully on the block, not half on and half off. The upright transfers the weight of the top rail and the lateral water pressure from the wall into the block and into the ground. An upright not fully seated on its block can tilt outward as the pool fills.
Top rails connect the uprights and lock the structure together. Install top rails loosely first, then tighten all hardware in sequence after the entire top rail ring is assembled. This allows the structure to settle into its final position before final tightening.
How to Install an Above Ground Pool Liner
The liner is the waterproof barrier that holds 14,000 or more gallons inside the pool. Liner installation separates a pool that lasts 15 years from one that requires replacement in 3 seasons. Wrinkles are the enemy. Every wrinkle is a weak point where debris collects and feet can catch.
Before unrolling the liner, install a ground cloth or geotextile fabric inside the pool area. Then spread 2 inches of washed masonry sand or use a foam pool cove and a foam pool floor pad. The sand or foam protects the liner from punctures from below. Level the sand with a straight board pulled across the surface.
Use the table below to choose the right liner type for your installation. The liner material determines lifespan, stretch tolerance during installation, and long-term resistance to UV and chemical degradation.
Product Comparison
Above Ground Pool Liner Types — Side by Side Comparison
Use this table to match the liner thickness and material to your pool’s needs before purchase.
| Liner Type | Thickness | Lifespan | Best For | Price Range |
|---|---|---|---|---|
| Standard (20-mil vinyl) | 20 mil (0.5mm) | 5-8 years | Budget installations, pools used less than 3 months per year | $100-200 |
| Premium (25-mil vinyl) | 25 mil (0.64mm) | 8-12 years | Most residential pools, full-season use in moderate climates | $200-350 |
| Heavy-duty (30-mil vinyl) | 30 mil (0.76mm) | 12-15 years | High-use pools, homes with pets that swim, harsh sun regions | $350-550 |
| Overlap liner style | Varies | Varies by thickness | Pools where wall height may vary slightly — excess overlaps outside | $100-400 |
Thickness measured in mils (1 mil = 0.001 inch). Thicker liners resist puncture and UV degradation longer but are harder to stretch during installation on hot days.
Unroll the liner on a warm sunny day. Vinyl becomes more flexible above 70°F. A cold liner below 60°F is stiff and resists stretching, which increases the risk of tearing during the bead installation. If your installation day is below 65°F, lay the liner in direct sun for 2-3 hours before attempting to hang it.
Drape the liner over the pool wall with an even overhang all around. For an overlap liner, the excess folds over the wall and is secured with coping strips after filling begins. For a beaded liner, the bead snaps into the track at the top of the wall.
Work out wrinkles immediately as the pool fills with 1-2 inches of water. Walk inside the pool in clean soft-soled shoes or bare feet and push wrinkles outward toward the wall. Smooth the liner from the center outward. Wrinkles under the water cannot be removed once the pool fills beyond 6 inches deep.
For a detailed guide on replacing a worn liner, see our article on how to replace an above ground pool liner with professional techniques for wrinkle-free results.
How to Fill the Pool and Install Equipment
Filling the pool is not passive. You must monitor the water level continuously during the fill and several times throughout the first 48 hours after. The liner stretches into its final position as the water rises.
Place a garden hose at the lowest point inside the pool. Run water at a steady pace. To estimate how long it will take to fill your pool based on your hose flow rate, try our pool fill time calculator. As soon as 1-2 inches cover the floor, walk inside and smooth wrinkles outward from the center. For an overlap liner, begin pulling the excess over the wall evenly and securing it with coping strips once the water reaches 6 inches deep.
Continue filling while monitoring for leaks. A pinhole leak at this stage is much easier to patch than after the pool is full. Run your hand along seams and corners feeling for dampness. Listen for hissing or trickling sounds behind the wall.
The skimmer and return jet holes must be cut precisely in the liner at the correct water level. Fill the pool to just below the skimmer opening before cutting. The water weight stabilizes the liner and prevents it from pulling away from the wall when you cut the openings.
Install the pool pump and filter system on a level equipment pad. Connect the hoses from the skimmer to the pump, from the pump to the filter, and from the filter to the return jet. Use stainless steel hose clamps at every connection and tighten them with a screwdriver, not just hand tight.
Step-by-Step Guide
Above Ground Pool Full Installation — Complete Step Sequence
14 steps · 2-3 days with two people · Review all steps before starting
Select the pool location using sunlight, tree, utility, and drainage criteria
Verify 6+ hours of sun, 20+ feet from large trees, no overhead power lines within NEC clearances, and a dedicated GFCI outlet within 25 feet.
Call 811 for utility marking at least 48 hours before excavation
Underground gas, water, electric, and communication lines must be located and avoided during any digging.
Level the ground by cutting down high spots to match the lowest native elevation
Use a laser level and grade rod. Achieve 1 inch or less variation across the entire pool footprint. Never fill low areas.
Set patio blocks flush with the ground at every upright position
Each 2x8x16-inch block must be dead level and exactly flush with the surrounding soil surface.
Lay out and connect the bottom track in a perfect circle
Measure the diameter in at least 4 directions. All measurements must be within 1/2 inch of the stated pool diameter.
Unroll the wall into the bottom track channel with two or three people
Confirm the wall is fully seated in the track at every point. Connect the wall ends with the joining plate and torque bolts to specification.
Install uprights on patio blocks and attach to wall
Verify every upright sits fully on its block. Tighten wall-to-upright hardware according to manufacturer torque specifications.
Install top rails loosely, then tighten all hardware in sequence
This allows the entire structure to settle into its final position under even tension before final tightening.
Install ground cloth or geotextile fabric plus 2 inches of sand base
Level and smooth the sand with a straight board. Install a foam pool cove around the perimeter where the wall meets the floor.
Install the liner on a warm day (above 70°F for vinyl flexibility)
Spread the liner evenly. For beaded liners, snap the bead into the track. For overlap liners, drape excess evenly over the wall.
Fill with 1-2 inches of water, then smooth all wrinkles toward the wall
Walk inside in clean soft-soled shoes. Push wrinkles outward. This is the only chance to remove wrinkles before they become permanent.
Continue filling to just below skimmer opening, then cut skimmer and return holes
The water weight stabilizes the liner for accurate hole cutting. Use the gasket as a template and cut carefully with a sharp utility knife.
Install pump, filter, and plumbing connections on a level equipment pad
Use stainless steel hose clamps on all connections. Hand-tighten plus 1-2 turns with a screwdriver for a leak-free seal.
Complete the fill, balance the water chemistry, and begin pump circulation
Fill to the middle of the skimmer opening. Add start-up chemicals per the manufacturer guide. Run the pump continuously for the first 48 hours.
What Are the Most Common Above Ground Pool Installation Mistakes?
Five mistakes account for the vast majority of above ground pool failures within the first three years. Each one is preventable with specific attention during installation. The cost of fixing any one of these after the pool is filled exceeds the time investment of getting it right during installation.
Building up low ground instead of cutting down high ground. Filled and compacted soil compresses under the water weight. The pool settles unevenly within weeks. The wall develops a visible lean. The liner stretches and eventually pulls out of the track. Always cut the high side to match the lowest undisturbed soil elevation.
Skipping the laser level and using a carpenter’s level instead. A 4-foot level cannot detect a 1-inch elevation change across a 24-foot span. A laser level with a grade rod measures elevation at every upright position to within 1/8 inch. Rent a laser level for $40-80 per day or buy an entry-level rotary laser level kit for about $200-300.
Installing the liner on a cold day. Vinyl below 60°F does not stretch properly. The bead resists snapping into the track. Overlap liners resist pulling evenly over the wall. The result is uneven tension, wrinkles that will not come out, and a higher risk of tearing at the bead during installation. Install on a day above 70°F or warm the liner in direct sun for several hours first.
Cutting skimmer and return holes before the pool has enough water. The liner needs the weight of 6-12 inches of water to press firmly against the wall and stay in position. Cutting holes in a dry liner risks the liner shifting during the fill and the holes ending up misaligned with the skimmer and return openings.
Not using a ground cloth or geotextile fabric under the liner. Even with 2 inches of sand, grass rhizomes, nut grass, and other persistent weeds can grow through the sand and puncture the liner from below. A geotextile ground cloth blocks root penetration and costs about $30-50 for a 24-foot round pool. Replacing a punctured liner costs $200-550 plus a full day of labor.
How Much Does Above Ground Pool Installation Cost?
DIY installation saves $800-1,500 in professional labor costs. The trade-off is 2-3 days of hard physical work and the responsibility for getting every measurement right. Professional installation includes the labor warranty and the installer’s experience with the specific quirks of your pool brand and model.
Professional installation typically costs $800-1,500 depending on pool size, site accessibility, and whether ground leveling is included. Leveling a severely sloped site can add $500-1,200 or more if heavy equipment is required. For sites with significant slope, read our guide on whether installing an above ground pool on a slope is possible and what it takes.
Additional costs beyond the pool kit include sand ($80-150 for 2-3 cubic yards), patio blocks ($40-60 for a full set), a ground cloth ($30-50), electrical work for the pump outlet ($200-500 if a new dedicated GFCI circuit is needed), and any required building permit fees ($50-200 depending on municipality).
The total DIY installation materials cost, excluding the pool kit itself, ranges from $400-900 for a typical installation with average site conditions. Professional installation adds $800-1,500 for labor but includes the installer’s expertise and warranty. For a personalized estimate tailored to your specific pool size and installation details, use our above ground pool installation cost calculator.
For a complete breakdown of pool costs including the initial purchase, see our detailed cost comparison between above ground and inground pool installation with lifetime ownership figures.
Above Ground Pool Setup: Common Myths vs Facts
Myth vs Fact
Above Ground Pool Installation — Common Myths Debunked
Separating fact from fiction on the most common installation misconceptions
✗ Myth
Above ground pools can be set up on any flat-looking area of the yard without special leveling.
✓ Fact
The ground must be leveled to within 1 inch across the entire pool footprint using a transit or laser level. A 1-inch height difference on a 24-foot pool equals approximately 1,200 pounds of additional water pressure on the low side wall. Visible flatness to the naked eye is not accurate enough.
✗ Myth
You can install an above ground pool in one weekend by yourself.
✓ Fact
A 24-foot round pool requires at least two people for wall assembly and liner handling. The wall alone weighs 80-120 pounds and must be walked into the track by multiple people simultaneously. Attempting solo wall installation nearly always results in the wall kinking and becoming unusable.
✗ Myth
Sand alone is enough base material for an above ground pool liner.
✓ Fact
A geotextile ground cloth must go under the sand. Sand does not stop nut grass rhizomes, tree roots, or sharp stones from working upward over time. The ground cloth is a $30-50 insurance policy against liner punctures that cost $200-550 to replace.
✗ Myth
Above ground pool liners last 15-20 years on average.
✓ Fact
Standard 20-mil liners last 5-8 years. Premium 25-mil liners last 8-12 years. Heavy-duty 30-mil liners can reach 12-15 years with proper water chemistry and winterization. UV degradation, chemical imbalance, and physical wear from cleaning tools all reduce liner lifespan.
✗ Myth
You do not need a building permit for an above ground pool.
✓ Fact
Most municipalities require a building permit for any pool deeper than 24 inches. Fencing and barrier requirements apply regardless of permit requirements. Check with your local building department before purchasing the pool. An unpermitted pool can create problems with home insurance and resale.
Above Ground Pool Foundation Options: Sand vs Foam vs Gorilla Pad
The pool floor foundation sits between the leveled ground and the liner. It protects the liner from punctures, provides a smooth surface for feet, and insulates the water from the ground temperature. Three foundation options cover most residential installations.
Washed masonry sand (2-inch depth): The traditional standard. Sand costs $80-150 for 2-3 cubic yards. It conforms to the ground shape and is forgiving of minor ground irregularities. The downside: sand can wash away if ground water seeps under the pool, creating voids that the liner sags into. Sand also provides zero insulation value.
Closed-cell foam pool floor pad: A foam pool floor pad adds cushioning and minor insulation (approximately R-1 to R-2). It costs $80-150 for a 24-foot round pool. Foam pads are easier to install than sand because they unroll and tape together at the seams. The pad must sit on a perfectly smooth ground surface free of any pebbles or debris that could press through.
Gorilla Pad or equivalent geotextile padding: A geotextile floor padding like Gorilla Pad provides puncture resistance without the bulk of sand. It costs $60-100. It is usually installed over a thin sand layer or directly on the ground cloth. It does not provide cushioning or insulation but blocks roots and sharp objects effectively.
The best combination for most installations is a geotextile ground cloth directly on the leveled soil, 2 inches of washed masonry sand on top of that, and a foam cove around the perimeter where the wall meets the floor. This combination provides puncture protection, a smooth floor surface, and proper cove support at the wall-liner junction.
What Electrical Requirements Apply to Above Ground Pool Installation?
Pool pump electrical connections are governed by the National Electrical Code (NEC) Article 680, which sets specific safety requirements for all swimming pool electrical installations. These are not optional guidelines. They are legal code requirements enforced during building inspections.
The pool pump must connect to a dedicated GFCI-protected circuit. A GFCI (Ground Fault Circuit Interrupter) shuts off power within 1/40 of a second if it detects a ground fault as small as 5 milliamps. This is the difference between a painful shock and a fatal electrocution in wet conditions.
The receptacle must be located at least 6 feet but not more than 20 feet from the inside wall of the pool. This distance prevents a cord-connected pump from reaching the pool water while keeping the outlet accessible. The 20-foot limit exists because pump power cords are typically 3-6 feet long and should not require an extension cord to reach the outlet.
All pool electrical equipment including pumps, filters with integrated timers, and salt chlorine generators must be bonded together with a solid copper bonding wire (minimum 8 AWG). The bonding wire connects all metal components to equalize electrical potential and prevent stray voltage from creating a shock hazard between any two metal parts a swimmer might touch simultaneously.
Above ground pools with metal walls must also have the wall bonded to the equipment bonding system. Most pool kits include a bonding lug on the wall for this purpose. If the pump is double-insulated and has a two-prong plug, the bonding requirement still applies to the pool wall and any other metal components in contact with the water.
Hire a licensed electrician for the dedicated circuit installation and bonding verification unless you have specific experience with NEC 680 requirements. The cost of a dedicated GFCI circuit installation ranges from $200-500 depending on the distance from the electrical panel to the pool location.
How to Winterize and Maintain Your New Above Ground Pool
The first winter is the most critical. A properly winterized above ground pool emerges in spring ready for chemical balancing and a few days of filtration before swimming. An improperly winterized pool can suffer freeze damage to the plumbing, a collapsed wall from ice expansion, or a liner that has pulled out of the track.
Lower the water level to 4-6 inches below the skimmer opening. Never completely drain an above ground pool for winter. The water weight counteracts ground pressure from freezing soil and prevents the wall from collapsing inward. An empty above ground pool in freezing ground is at serious risk of wall collapse.
Blow out all plumbing lines with a shop vac or air compressor. Remove drain plugs from the pump, filter, and heater. Store the pump, filter gauge, and any removable equipment indoors where they will not freeze. Water trapped inside a pump volute freezes, expands by approximately 9% in volume, and cracks the housing.
Add winterizing chemicals: a pool winterizing kit typically includes a chlorine shock treatment, an algaecide, and a stain and scale preventer. Follow the dosing instructions based on your pool’s gallon capacity. Install a winter cover with a cable and winch system that pulls it tight across the top rails.
Place an air pillow under the winter cover in the center of the pool. The pillow absorbs ice expansion pressure that would otherwise push outward against the pool wall at the waterline. Inflate the pillow to about 60-70% of its capacity so it has room to compress as ice forms.
Cost Reference
Above Ground Pool Installation — Cost by Pool Size and Installation Type
All values pre-calculated. Find your pool size and installation method to see the total estimated cost including materials.
| Pool size ↓ Method → | DIY — Full | DIY — Kit Only | Pro Install |
|---|---|---|---|
| 15-foot round · 5,300 gal | $1,800-3,000 Pool + materials |
$1,200-2,200 Pool kit only |
$2,800-4,500 Installed complete |
| 18-foot round · 7,600 gal | $2,200-3,500 Pool + materials |
$1,500-2,800 ★ most common |
$3,200-5,200 Installed complete |
| 24-foot round · 14,000 gal | $2,800-4,500 Pool + materials |
$2,000-3,500 Pool kit only |
$3,800-6,500 Installed complete |
| 27-foot round · 18,000 gal | $3,300-5,500 Pool + materials |
$2,500-4,200 Pool kit only |
$4,500-7,500 Installed complete |
DIY Full includes pool kit, sand, patio blocks, ground cloth, foam cove, and equipment. Pro Install includes labor and materials. Electrical work for dedicated GFCI circuit ($200-500) not included in any estimate. ★ highlights the most common above ground pool size purchased.
Quick Reference
Above Ground Pool Installation — Key Terms Explained
Quick reference for the terms used throughout this guide
A liner with a rigid bead at the top edge that snaps into a track (bead receiver) at the top of the pool wall. Hangs from the track rather than overlapping the wall.
A liner whose excess material folds over the top of the pool wall and is secured by coping strips. More forgiving of slight wall height variations than beaded liners.
The metal channel that sits on the ground and holds the bottom edge of the pool wall in a circular shape. Must form a perfect circle with diameter variations under 1/2 inch.
A 2-inch thick by 8-inch by 16-inch concrete block placed under each upright to distribute the pool’s weight and prevent the upright from sinking into the ground over time.
A wedge-shaped foam piece that sits at the inside perimeter where the pool wall meets the floor. Prevents the liner from being pushed into the sharp corner where wall meets sand.
Ground Fault Circuit Interrupter — a safety device required by NEC 680 for all pool pump electrical connections. Shuts off power within 1/40 second if a 5-milliamp ground fault is detected.
A woven fabric barrier installed between the leveled soil and the sand base. Blocks grass, nut grass rhizomes, and roots from growing through the sand and puncturing the liner from below.
One mil equals 0.001 inch. Standard pool liners are 20-30 mils thick. A 25-mil liner is approximately the thickness of a heavy-duty credit card (0.025 inches or 0.64mm).
A gas-powered machine that vibrates soil to increase its density. Essential for compacting leveled ground before installing the pool. Prevents settling that causes the pool to go out of level.
A plastic or metal strip that clamps the excess overlap liner material to the top of the pool wall. Installed after the pool begins filling and the liner is positioned correctly.
Frequently Asked Questions About Above Ground Pool Installation
Can I install an above ground pool on a slight slope without building a retaining wall?
Quick Answer: Slopes of 1-2 inches across the pool footprint can be corrected by cutting down the high side alone. Slopes exceeding 6 inches across the footprint typically require professional excavation or a retaining wall because the amount of soil to remove on the high side destabilizes the surrounding grade.
For slopes between 2 and 6 inches, the high-side cutting method works but requires significantly more labor. The excavated soil must be moved well away from the pool area so it does not wash back under the pool during rainstorms.
For more complex slope situations, our separate guide covers installing above ground pools on sloped yards with engineering and drainage requirements.
What is the difference between a beaded liner and an overlap liner, and which is better for DIY installation?
Quick Answer: A beaded liner snaps into a track at the top of the wall and requires the wall height to be exact. An overlap liner folds over the wall and is secured with coping strips. Overlap liners are more forgiving for DIY installers because minor wall height variations do not prevent proper installation.
Beaded liners look cleaner because there is no excess material hanging outside the pool. However, if the pool wall varies in height by more than 3/8 inch at any upright, the bead may not engage the track correctly at all points.
For first-time DIY installers, the overlap liner provides a margin for error that the beaded liner does not offer. The excess material can be trimmed after installation is complete for a neater appearance.
Why does my above ground pool wall look wavy or uneven after filling?
Quick Answer: A wavy wall after filling usually means the bottom track was not a perfect circle during assembly. Even a 1-inch deviation from a true circle creates visible wave patterns in the wall under the 117,000-pound water load.
Other causes include uprights not sitting fully on their patio blocks, top rails tightened unevenly, or a wall that was not fully seated in the bottom track channel before the ends were connected.
Minor waviness (under 1/2 inch of deflection) is cosmetic and does not affect structural integrity. Larger waves may indicate the bottom track was assembled oval rather than circular. The fix requires draining the pool and reassembling the bottom track to a true circle measured in multiple directions.
Can I use sand from my property instead of buying washed masonry sand?
Quick Answer: No. Native sand or fill sand from a property contains rocks, sharp particles, and organic material that will puncture the liner. Washed masonry sand is screened to remove particles larger than 3/16 inch and washed to remove clay and organic material.
Masonry sand costs $40-60 per cubic yard delivered. A 24-foot round pool needs 2-3 cubic yards. The $120-180 material cost is negligible compared to the $200-550 liner replacement cost and the labor to drain and reinstall a punctured pool.
Do I need a permit for an above ground pool, and what happens if I skip it?
Quick Answer: Most municipalities require a building permit for any pool deeper than 24 inches held more than 2 feet of water. Installing without a permit can void homeowner insurance coverage for pool-related claims and create disclosure problems when selling the home.
Permits typically cost $50-200 and require a site plan showing the pool location relative to property lines, structures, and utility easements. The inspector verifies the electrical connection, bonding, and barrier/fencing requirements after installation.
Call your local building department before purchasing the pool. Ask specifically about pool permit requirements, setback distances from property lines, and fencing regulations. This 10-minute call prevents expensive problems later.
What is the minimum distance an above ground pool must be from a house foundation?
Quick Answer: Most building codes require a minimum 10-foot setback from any permanent structure foundation, though local codes vary. The primary concern is that a catastrophic pool wall failure could release 14,000 gallons of water directly against a foundation wall, potentially causing structural damage.
Additional setbacks apply to property lines (typically 5-10 feet) and utility easements (varies). Check your local zoning ordinance for the exact numbers that apply to your property. The setback is measured from the pool wall, not the water edge.
How long should I run the pump after filling a new above ground pool?
Quick Answer: Run the pump continuously for the first 48 hours after filling to distribute the initial chemical treatment evenly. After that, 8-12 hours per day during the swimming season achieves one full water turnover per day for most residential above ground pools.
One turnover means the entire pool volume passes through the filter once. For a 14,000-gallon pool with a pump rated at 40 GPM, one turnover takes approximately 5.8 hours (14,000 ÷ 40 ÷ 60 = 5.8). Running 8 hours provides roughly 1.4 turnovers, which is adequate for a residential pool with average bather load.
Monitor the water clarity during the first week. If the water appears cloudy after 48 hours of continuous running, the filter may need cleaning or the initial chemical balance may need adjustment.
Can I set up an above ground pool on concrete or asphalt?
Quick Answer: Yes, but with specific requirements. Concrete and asphalt are impermeable and prevent ground moisture from evaporating upward. This trapped moisture can cause liner mildew from below. A geotextile ground cloth and a foam pool floor pad are mandatory between the concrete and the liner to allow some air circulation.
On asphalt, the pool weight (117,000 pounds for a 24-foot round) can cause the asphalt to deform on hot days. Asphalt softens above 120°F surface temperature, which is common in direct summer sun. A layer of 2-inch rigid foam insulation board between the asphalt and the pool floor pad helps distribute the load and insulate against heat transfer.
Never install an above ground pool on a wooden deck, even a reinforced one. The concentrated point loads at the uprights will punch through deck boards over time.
What kind of warranty comes with a DIY-installed above ground pool?
Quick Answer: Most above ground pool manufacturers provide a structural warranty on the wall (20-40 years prorated) and a separate warranty on the liner (1-5 years) regardless of professional or DIY installation. However, damage caused by improper installation is excluded from all warranty coverage.
The warranty typically requires proof that the pool was installed on level ground within the specified tolerance (usually 1 inch) and that the base materials met the manufacturer’s specifications. Photograph every stage of your DIY installation including the laser level readings at each upright position as documentation.
Professional installation from an authorized dealer often extends the installation workmanship warranty by 1-2 years specifically covering problems arising from the install itself like settling or liner pulling out of the track.
How do I prevent grass and weeds from growing through the pool liner?
Quick Answer: Install a geotextile ground cloth between the leveled soil and the sand base. The cloth blocks root penetration while still allowing ground moisture to evaporate upward through the sand. Never use plastic sheeting (polyethylene) as a ground barrier because it traps moisture and promotes mold and mildew under the liner.
Treat the bare soil with a non-selective vegetation killer 2 weeks before installation if the area had persistent weeds like nut grass or Bermuda grass. Allow the chemical to fully degrade before installing the ground cloth. Check the product label for soil residual time.
Nut grass (nutsedge) is the most common culprit for liner punctures because its sharp rhizome tips can push through sand and thin liners. A geotextile cloth rated at 4 ounces per square yard or heavier stops nut grass penetration.
What should I do if it rains during the installation process?
Quick Answer: If the wall and frame are assembled but the liner is not yet installed, cover the sand base with a tarp to prevent erosion. Standing water on the sand base creates low spots and washes sand toward the edges. These irregularities will show through the liner permanently.
If the liner is installed but the pool has less than 1 foot of water, heavy rain can float the liner and create wrinkles that will not come out. Pump out any accumulated rainwater from inside the liner before continuing the fill.
If the ground around the outside of the pool becomes saturated and muddy, wait 24-48 hours after the rain stops for the ground to firm up before continuing. Walking on saturated ground around the pool compacts the soil unevenly.
How do I know if my above ground pool wall is properly seated in the bottom track?
Quick Answer: Walk around the entire pool after the wall is placed in the bottom track and before connecting the wall ends. Shine a flashlight along the bottom of the wall on both the inside and outside. The wall must be fully visible inside the track channel with no gaps and no sections riding up over the track edge.
Use a flathead screwdriver or pry bar to gently guide any sections that are not fully seated into the track. Do not force the wall with excessive pressure that could bend the bottom edge. If a section repeatedly rides up, the bottom track may be out of round at that point and needs adjustment before proceeding.
This is the most critical quality check in the entire installation. A wall section not fully captured in the track will blow out when the pool is full. The 117,000 pounds of outward water pressure will find any weakness in the wall-to-track connection.
What is the best time of year to install an above ground pool?
Quick Answer: Early spring through early summer when daytime temperatures are consistently above 70°F but before peak summer heat. The 70°F minimum is important for vinyl liner flexibility. Installation in fall is possible but risks cold weather arriving before the liner is properly stretched and chemicals are balanced.
Spring installation allows a full swimming season for the ground to settle, the liner to stretch into its final position, and any minor issues to be caught and corrected. Fall installation means the pool sits unused through winter while any installation issues go undetected for months.
Avoid installation when the ground is wet and muddy from spring thaw or recent heavy rain. Wet soil compacts unevenly and the laser level readings become unreliable as the tripod sinks into soft ground.
Congratulations on completing your above ground pool installation. A pool installed with careful attention to ground leveling, wall assembly, liner installation, and equipment setup will provide 10-15 years of reliable summer enjoyment. The time invested during installation in getting the base level and the wall circular pays back every season in a pool that looks right, holds its shape, and requires only routine maintenance. If you are still comparing pool options before installation, our complete swimming pool types comparison guide covers every option from temporary seasonal pools to permanent inground installations. For the full comparison between above ground and inground pools to confirm you have made the right choice for your property, read our detailed inground versus above ground pool decision guide. If you are ready to shop, our roundup of the best above ground pools across all sizes and budgets will help you select the right model for your yard.
| Photo | Best Above-Ground Pools | Price |
|---|---|---|
|
|
Bestway Steel Pro MAX 12' x 30" Above Ground Swimming Pool Set with Pump | Check Price On Amazon |
|
|
INTEX Beachside Metal Frame 10ft x 30in Round Pool Set w/Pump | Check Price On Amazon |
|
|
H2OGO! Kids Splash-in-Shade 8-Foot Round Steel Frame Above Ground Pool with Water Mister and Canopy Sunshade, Green Tropical Leaf Print | Check Price On Amazon |